When it comes to creating seamless, head-turning transformations with luxury i-tip hair extensions, technique is only half the story — your tools are what bring that artistry to life. The right products don’t just make your job easier; they protect your client’s natural hair, extend the life of their extensions, and elevate the entire experience in your chair.
At Olivia Christensen Salon, we’ve redefined what luxury hair extensions can be by creating extensions that blend, move, and style effortlessly, giving your clients the confidence that comes from truly flawless hair. From our Clarifying Shampoo that preps the scalp for installs, to our signature brushes designed to detangle without disturbing bonds, every tool we create is crafted with stylists and extensions in mind.
If you’re ready to offer your clients the same luxury experience and results that last, it all starts with using the right tools — and joining the OC Extensions Waitlist to bring our premium line to your salon. You can join the waitlist here.
Quick Note: Not all hair is created equally. In fact, there’s a dark side to the hair extensions industry. At Olivia Christensen Salon, we’re determined to do things differently. Our premium, luxury hair extensions are full-cuticle, real human-hair that’s always ethically sourced. If you want to learn more about where a lot of hair comes from, read this post.
Now, let’s dive into the tools that every hairstylist needs to offer luxury hair extensions to their clients.
Essential Tools for Extension Care: What Every Stylist Needs
Step One: Prep the Hair
You should always start with prepping your clients hair. You want their hair to be clean and free from oils, creams and conditioners. We know how important it is to have the right shampoo, that’s why we designed our own.
Our Cleanse Clarifying Shampoo is professional-grade and formulated with an anti-residue blend that deeply purifies hair without stripping it. It removes buildup and impurities while creating the perfect foundation for long-lasting hair extension adhesion. We use this Clarifying Shampoo before every install and ask our clients to use it on the day of their appointments.
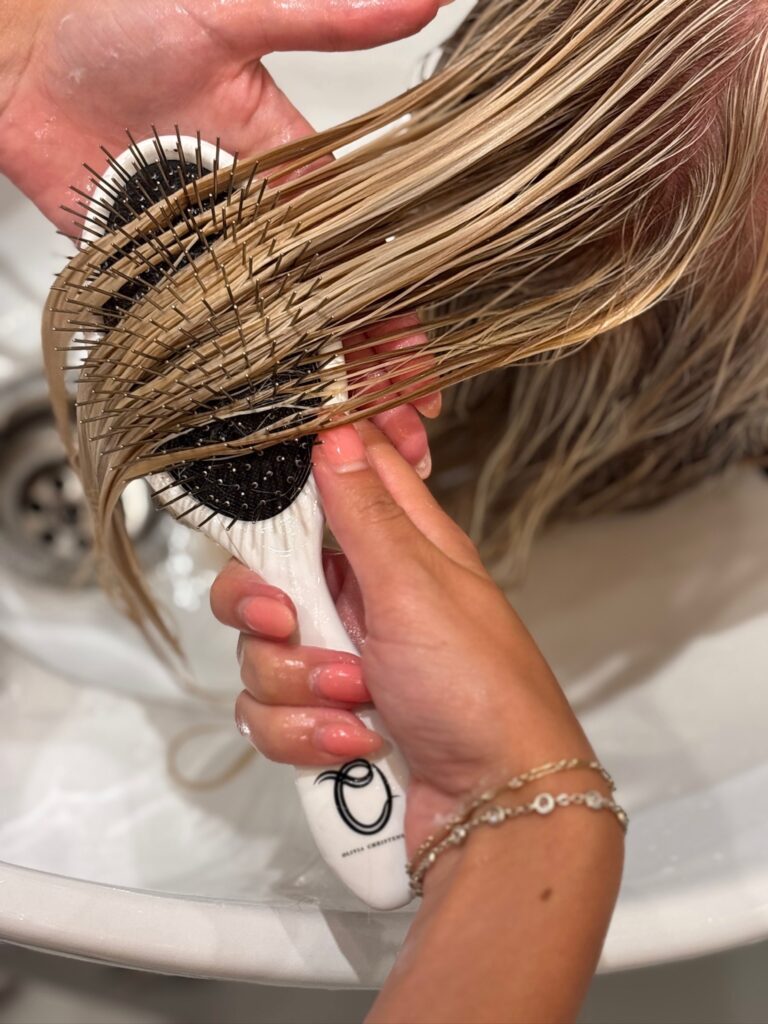
After the hair is clean, make sure that it’s free from knots and tangles. Our Untangle Me Brush is a classic brush that features gentle metal bristles, making detangling your clients hair so much easier. It’s the perfect hair brush to use after a wash.
Now that your client’s hair is properly prepped, let’s move onto some of the tools that you’ll need for the hair extensions installation.
Step Two: Installation
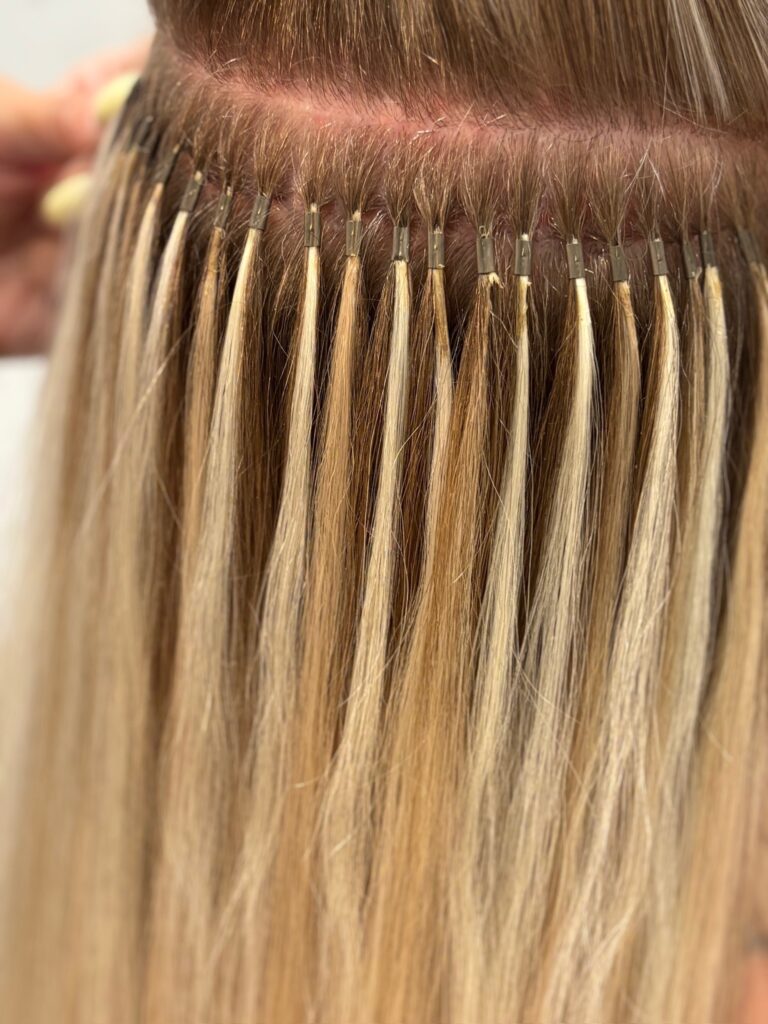
There are a variety of tools that you’ll need for a professional and luxurious installation. At Olivia Christensen Salon, we focus solely on high-quality i-tip hair extensions. This specific type of hair extensions are attached with a small microbead – no heat or chemicals are involved.
A tail comb and sectioning clips are essential for clean, precise parting and effortless installation. Next, keep your loop tool and plenty of beads within reach. These tools ensure a smooth process as you connect your client’s natural hair with the extensions. To finish, use a high-quality pair of extension pliers to securely fasten each bead, creating a flawless and lasting hold.
As you work, gently comb through your client’s hair to keep each section smooth, tangle-free, and perfectly blended from root to tip.
Step Three: Blending
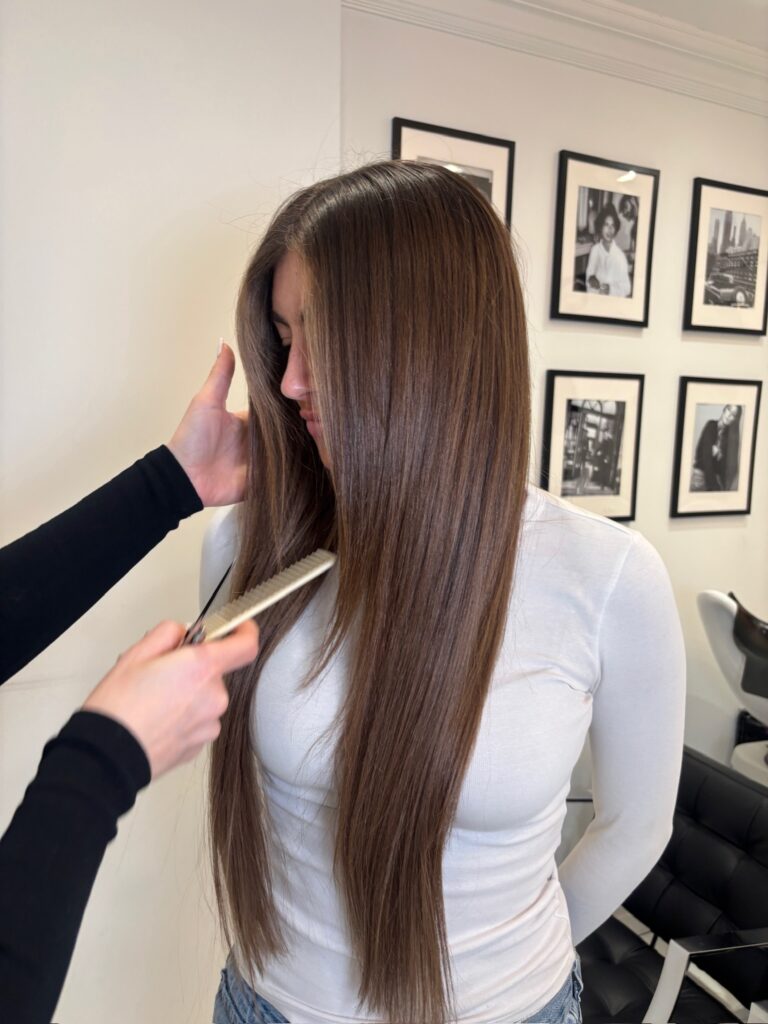
Arguably the most crucial step in any hair extension installation is the haircut. This is when you ensure that the extensions blend seamlessly with your client’s natural hair, creating a flawless and natural finish. For this step, it’s essential to use a high-quality, sharp pair of scissors. Sharp scissors provide clean, precise cuts, while dull scissors can cause fraying and damage to both your client’s hair and the extensions.
Stylist Tip: When cutting extensions, work in small sections and cut into the ends at a slight angle to create movement and a soft, natural look. This helps the extensions blend effortlessly with your client’s layers.
Step Four: Styling
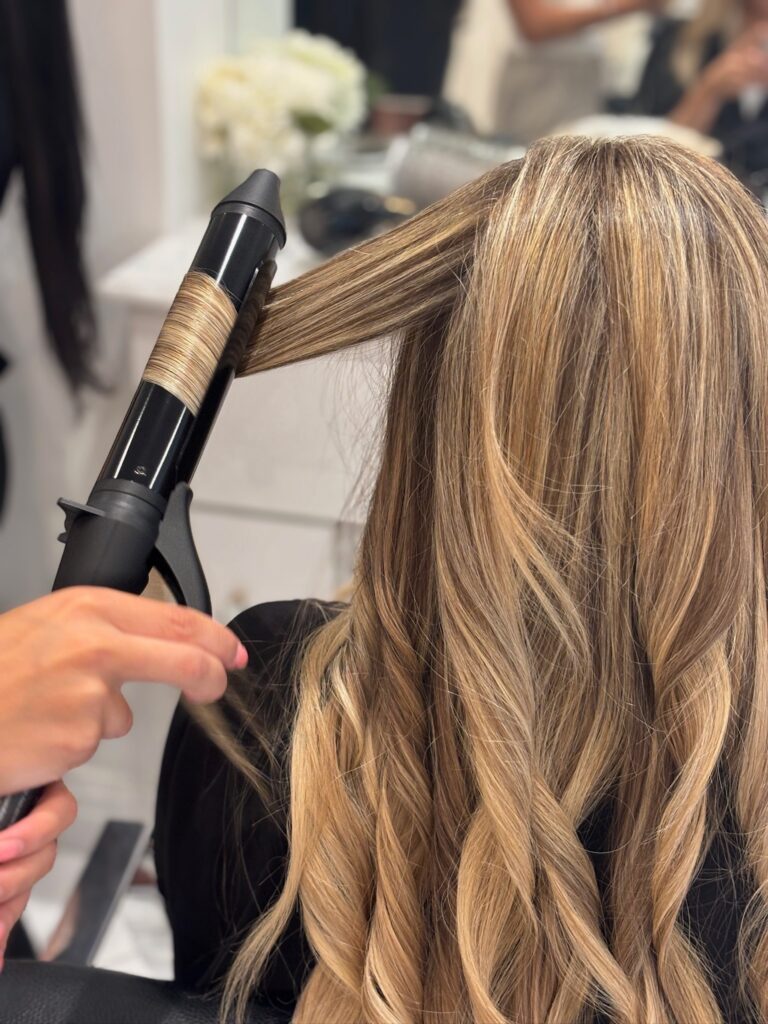
Finally, it’s time to style your client’s hair — the moment when you get to truly showcase their transformation. We love creating big, bouncy blowouts that add both length and volume. When styling, it’s crucial to use the right tools: always start with a heat protectant (this is our favorite), and style using a high-quality blow dryer, straightener, or curling iron.
Keep in mind that oils and creams should never be used with i-tip hair extensions, as they can cause the bonds to slip. Always stick to extension-safe products, and educate your clients to do the same. Using high-quality, silicone-free shampoo and conditioner along with an extension-safe brush will keep their hair healthy, shiny, and perfectly maintained.
Shop our hair extension starter kit here.
Stylist Tip: After blow-drying or curling, gently run an extension-safe brush through the ends to blend the natural hair with the extensions. For extra volume, try lifting sections at the roots and lightly backcombing before smoothing over the top layer — it adds body without disturbing the bonds.
At the end of the day, having the right tools helps you deliver a luxurious experience, but the real game-changer is the quality of your hair extensions. Full-cuticle, 100% human hair is a must—anything less just won’t do.
That’s why we’re excited to introduce Olivia Christensen Extensions – the Birkin of bundles. We’re raising the standard for luxury hair extensions, and now you can be part of it. Join the waitlist today to be among the first stylists to access our launch and offer your clients the ultimate extension experience.