
I-tip extensions are one of the most popular options for women looking for discreet, seamless, natural-looking extensions. We specialize in them at our two New York Salons, and our founder, Christina, developed her own unique installation technique that blends the extensions seamlessly with your natural hair for the most undetectable look possible.
We love to compare i-tips to other extension methods, but today we’re going to dedicate this post to what i-tips are, who they’re best for, and what the installation process looks like. If you’ve ever wondered why we’re so obsessed with i-tips, hopefully this post will shed some light.
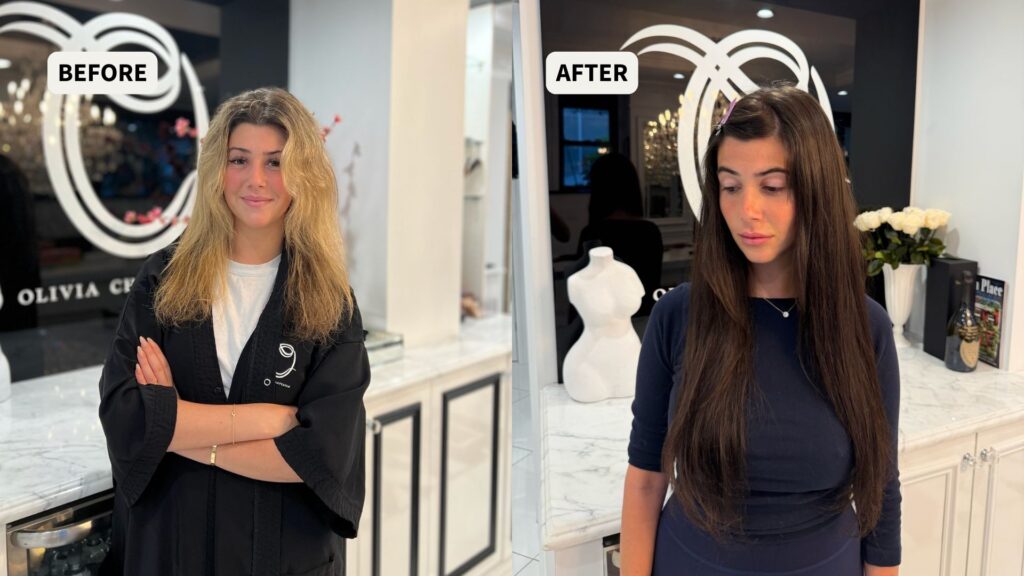
What are i-tip extensions?
I-tip extensions are a strand-by-strand extension method where we take small bundles of extension hair and attach them to your natural hair with small rings. What makes this method unique is that we install the hair strand-by-strand, rather than in large wefts. This matters, especially for women with fine or thinning hair and sensitive scalps.
Another thing that makes i-tips so unique is that they are installed without heat, glue, or chemicals, making them far less damaging to your hair. They’re a great way to add highlights without chemicals, and more often than not, our clients see their hair grow when wearing our extensions.
I-tip extensions are perfect for women of any hair length and type because you can fully customize the density, color, length, and placement. We’ve helped women with hair only a few inches long, incredibly thinning hair, and those who want to add dimension without bleach.
Other names for i-tip extensions
You might not be familiar with the term i-tips because you’ve heard them called by one of their other names. You might hear i-tips referred to as:
- Micro-link extensions
- Micro-bead extensions
- Micro-ring extensions
- Stick tip hair extensions
If you hear someone refer to extensions by any of those names, they’re also talking about i-tips. And throughout our content and at our two New York Salons, we always refer to them as i-tip extensions.
How are i-tip extensions installed?
Now that you know what they are, let’s talk about how we install them. Again, the installation method is what makes these extensions so unique and safe for your hair.
As we mentioned before, i-tips are installed strand by strand, and it’s important to have them installed by an experienced professional. These are the safest hair extension method, but your hair’s health throughout the process also depends on working with an experienced professional.
A full head of extensions can take anywhere from 1-3 hours, depending on how much hair is being installed and your stylist’s experience level. Our specialists have extensive experience installing i-tips, and we’ve helped women get a full head in about an hour.
Step 1: Preparation
We wash your hair with our Cleanse Clarifying shampoo and dry thoroughly. We remove all product residue, especially from your roots. You want your hair clean and dry so the extension rings can grip your hair properly and sit flat against your scalp.
After we clean your hair, we also prepare the extensions. This method is unique to our founder, Christina. Very rarely is your hair just one color; it usually has natural dimension, especially for more ‘lived-in’ looks that are becoming increasingly popular. That’s why we also need to prepare the extensions, which involves custom blending anywhere from 1-3 different colors together.
Once we have the extensions prepared, we’re ready to start the installation process.
Step 2: Sectioning
We then divide your hair into horizontal sections, starting at the nape of your neck. We work upward, installing row by row. Consistent sectioning ensures your extensions are evenly distributed throughout your head.
Neat, tidy sectioning helps the extensions lay flat and not matte.
Step 3: Threading
Once your hair is sectioned, we take a small selection of your natural hair, about the same width as the extension stand, and thread it through a micro ring using a needle-like tool.
Step 4: Insertion
Once we thread your hair through the ring, we insert the i-tip strand alongside it. The tip of the extension will sit just inside the ring.
Step 5: Clamping
We then gently clamp the ring shut using a specialist micro ring plier tool. This secures both your natural hair and the extension strand close to the root.
Step 6: Blending
This is hands down the most important step in the process. Once all the strands are in place, cut and blend the extensions with your natural hair. This creates a seamless, natural finish. Without the blending at the end, your extensions would be obvious.
If you have short hair and long extensions, this blending will add layers and dimension. With the right installation and blending, your i-tip extensions should be completely invisible. That’s what we love so much about this method.
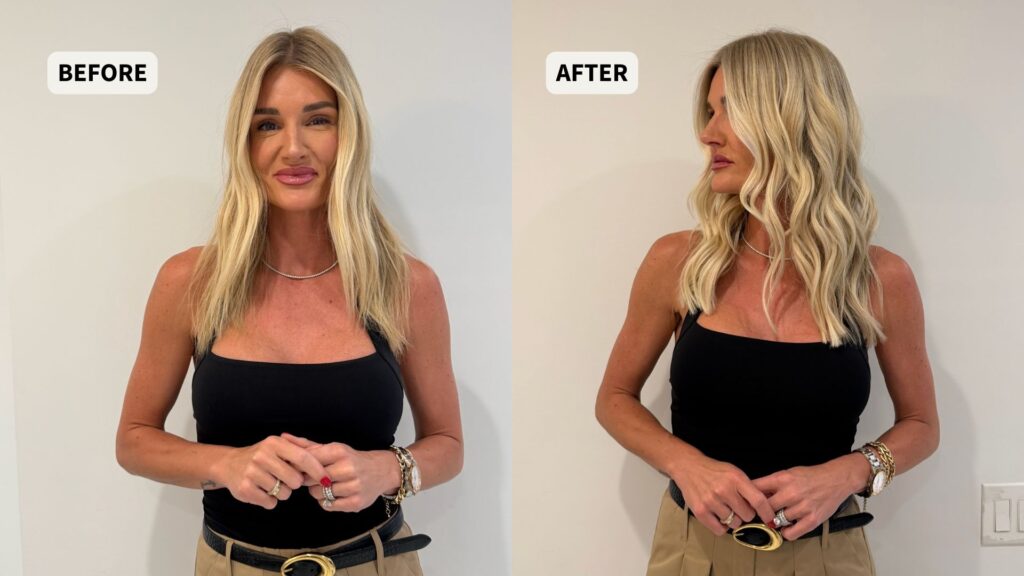
Who are i-tip extensions best suited for?
Women of all hair types
I-tips suit women of all hair types. When you have thicker hair, you’ll just need to add more extension hair to match the density of your natural strands. If you have thinner hair, we can get away with adding less while keeping the placement and density as natural as possible.
Active women
I-tips are also suitable for active clients who don’t want their extensions to get in the way of their day-to-day lives. With i-tips, you can work out like normal, swim in the ocean, and easily pull your hair up into a ponytail without your attachment points showing.
Women who want to avoid adhesives and harsh chemicals
Because this method requires no heat, glue, or harsh chemicals, it’s perfect for women who want to avoid them. Many of our clients want their hair to look as natural as possible, with a lived-in, healthy look, even with extensions. Because this method is so safe, you can feel comfortable choosing it.
How long do i-tip extensions last?
Another benefit of i-tip extensions is that they’re among the longest-lasting extension methods. With high-quality, real human hair and proper aftercare, extensions can last up to 12 months.
You will also need to come into the salon every 6-8 weeks, depending on how fast your hair grows, for maintenance. At maintenance appointments, we remove the extensions, comb out any hair fall, and reinstall them. These appointments are vital to keeping your hair healthy and extending the life of your extensions.
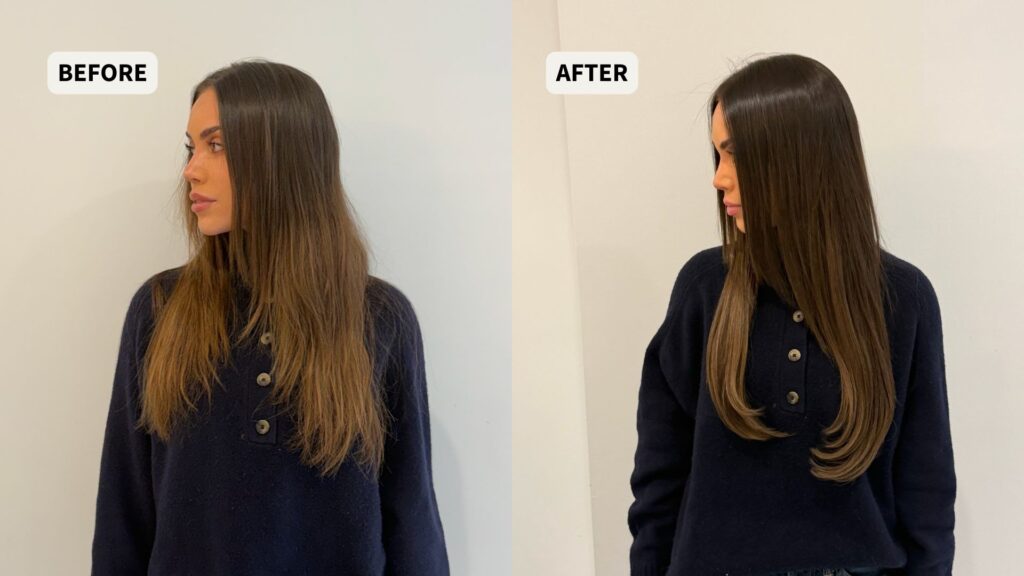
I-Tip extensions aftercare
Since aftercare is so important, we won’t send you away without instructions on how to care for your extensions. However, you’ll quickly learn that our luxury i-tip extensions are the best way to get more low-maintenance hair. Yes, you’ll need to take care, and you won’t be able to use some popular products like oils and hair masks, but otherwise you’ll find that extensions are easy to care for at home.
Let’s go over some essential extensions aftercare.
Washing
Use sulfate-free, extension-safe products. Luckily for you, our founder, Christina, developed her own line of shampoos and conditioners that are safe for extensions. Our Signature Shampoo is even safe for daily use, and we use the clarifying shampoo each time you come into the salon for maintenance.
Wash your hair regularly to prevent oil buildup at the attachment points, and always avoid using conditioner at your roots.
Drying
Always dry your hair after washing. When your hair is wet, it’s at its most vulnerable, and your extensions are no different. Use a heat protectant and gently dry your hair after washing. Never go outside in the cold with wet hair, and always dry it before bed.
Brushing
Brush your hair often, always starting at the ends and working your way up. We have two hairbrushes specifically designed for extensions, so make sure you invest in the right equipment to care for your hair. Avoid pulling on your extensions, and brush often enough to prevent matting. Tangling and matting at the root is almost always avoidable with regular brushing.
Sleeping
Never go to sleep with wet hair, and always put it in a loose braid before bed. We also recommend sleeping on a silk or satin pillowcase.
Products to avoid
- Oils, especially applied near the roots
- Products containing sulphates
- Dry shampoos sprayed directly onto the rings
- Products containing heavy silicones
- Hair masks (instead, ask for a hydrating treatment at your next maintenance appointment)
I-Tip Extensions Compared to Other Types
How do i-tips compare to other popular extension methods?
| Extension Method | I-Tips | K-Tips | Wefts | Tape-Ins | Clip-Ins |
| Lifespan | 12 months (with proper care) | 4-6 months | 6-12 months (depending on the hair and maintenance) | 4-6 months | Not a permanent extension method so lifespan will depend on how often you wear them and the type of hair |
| Reusability (of the hair) | Yes | No | Yes | Yes (usually around 2 times) | Yes |
| Installation method | Strand-by-strand | Strand-by-strand | Wefts of hair sewn onto your natural hair | Small wefts of hair taped to your natural hair | You add and remove when you want to wear them (not permanent) |
| Chemical or heat installation | No | Yes, the bonds are heated and melted onto your natural hair | No, the hair is typically sewn to your natural strands | Yes, the tape is heated and melted onto your natural hair | No |
| Maintenance | Yes, every 6-8 weeks | No | Yes, every 6-8 weeks | Yes, every 8-12 weeks | No |
| Styling versatility | Can style completely like normal | Can style completely like normal | Styling in ponytails and updos can be difficult | Styling in ponytails and updos can be difficult | Styling in ponytails and updos can be difficult |
Frequently Asked Questions
How Much Do Hair Extensions Cost?
It’s impossible to give one straight answer to how much hair extensions cost. The cost depends on the hair quality, the amount needed, the method, and the salon.
Custom bonded K-tip extensions and luxury, high-quality I-tips are some of the most expensive methods, but they’re also the most natural and seamless. Here’s the truth: the cheapest method isn’t the best, unless you’re happy for your extensions to be obvious and hard to style.
How long do extensions last?
Again, how long your extensions last depends on hair quality and the application method. I-tips are the most reusable method, lasting up to 12 months, while K-tips can’t be reused, so they only last 4-6 months. Clip-ins can last for years, depending on how well you care for them and how often you use them.
Can I exercise with extensions?
You can absolutely exercise with extensions. If you can’t, that’s a big red flag for both the hair type and the extension method. With our high-quality, luxury i-tips, our clients can exercise, travel, and style their hair like normal. Nothing changes; you just have more hair.
Will hair extensions damage my natural hair?
Hair extensions should never damage your natural hair. That said, the wrong method on thin, fine, or sensitive hair can cause breakage, bald spots, and thinning. If your extensions are too heavy for your natural hair, you might get headaches and see very little hair growth while you’re wearing them. We’ve seen this happen with every extension method. It always comes down to choosing the right method for YOU and making sure that you always go to an experienced professional.
How can I get started?
If you’re ready to start your hair extensions journey, book a consultation with our founder, Christina. A consultation is an important part of your extension journey. It’s not only a chance for us to answer your questions, but also an opportunity for our stylists to assess your hair type and plan your transformation.
Ready to learn more? Book a consultation with our founder, Christina, today.
Want to keep reading about hair extensions? We’ve put together the ultimate guide to help you understand hair extensions, especially if you live in the New York area. You can read that guide next.